If you want to learn how I made this cut out shoulder top then keep on reading!
P.s. This is my first ever blog post so i'm not entirely sure how Blogspot works, sorry for any mistakes and the pictures might be in a weird order, please comment any advice on how to make this better, thanks!
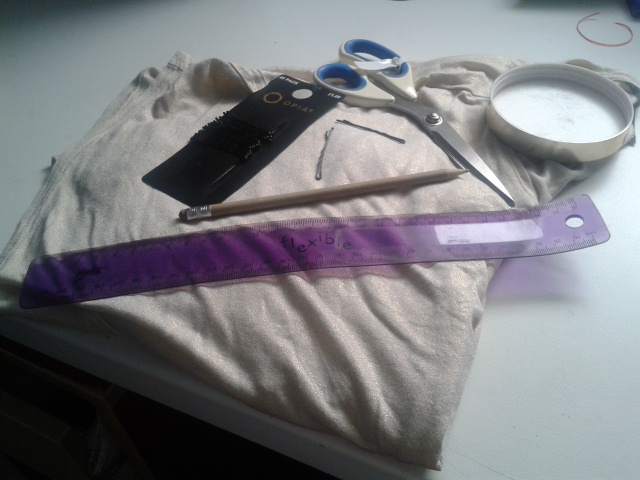
What you'll need:
-A top with baggy, long or baggy and long sleeves (these can be crop tops, tight fitting tops, anything you want! I personally think it looks great with collared blouses!).
-Something to measure with like a ruler or measuring tape.
-A pencil or chalk (nothing too permanent, so pen is a bad idea).
-Something circular to draw around, you may want to use a compass but a jar or something similar will work just as well!
-Something to pin the fabric together, I used kirby grips/bobby pins but hair clips or sewing pins work just as well!
-Scissors
Step 1
Try on the top to see how it'd look with cut out shoulders. Still wearing the top, mark the point where you want the cut outs to start. Try not to make the mark too close to the collar. We'll now refer to this mark as the 'Starting Mark'.
Step 2
Lay the top down and measure the distance between the innermost edge of the collar and the starting mark. Keep a note of the distance.
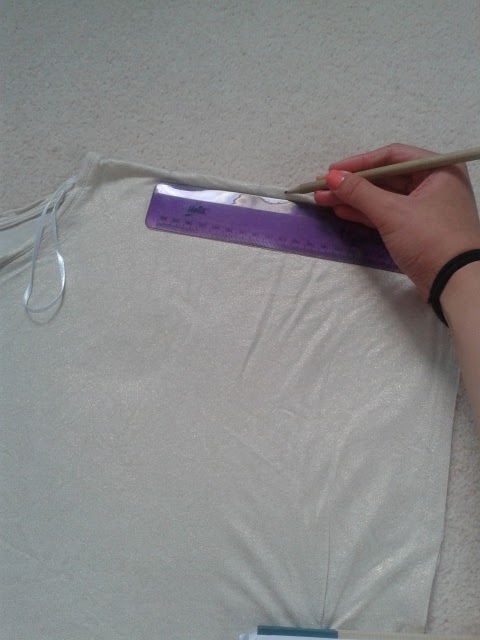
Step 3
Use the measurement from the collar to the starting mark and measure the same distance down the sleeve from the starting mark. Then mark that point.
For example: If my top was 5cm from the collar to the starting mark I'd measure 5cm down the sleeve from the starting mark.
Step 4
Now try it on to see if you like the position of the cut outs. Make any adjustments necessary. I found that I had to make my cut outs 3cm bigger but be careful not to go too big because once its cut you can't go back, whereas you can always adjust it later if it's too small.
Step 5
Use your circular object/compass to draw a semi circle connecting the two points. Try to make them as even as possible.
Step 6
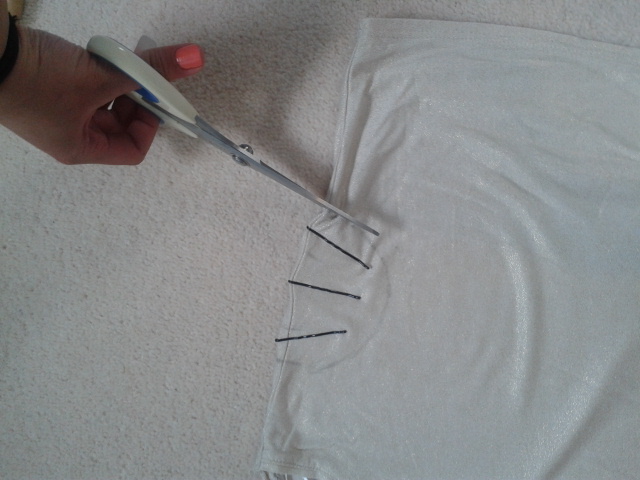
Use your kirby grips/bobby pins, or whatever you decided to use, and pin the fabric together within the semi circles.
Step 7
Make one last check of your measurements to ensure that your cut outs will be as symmetrical as possible. Now go ahead and cut around the semi circle, try to cut around the pencil marks so they don't show on the finished top and make the cut as smooth as possible.
Step 8
Once both semi circles are cut out, try on your new top! Make any adjustments to the cut outs as you see fit.
Here's some pictures of what my finished top looked like. Mines was really baggy so I tucked it into my high waisted jeans, to dress it up a bit I'd wear it with disco pants or something similar, and to top it off I wore gold jewellery!
Thanks for reading and I hope that this was helpful and easy to follow!
Please leave me any comments that you have and follow @floralkissesblog on instagram!x


No comments:
Post a Comment